Exhibit A
Tell me I'm not the only one who gets these...
Exibit B
Yeah I know this is a big one. Not sure what happened here...
Here's a little preview of the cedar topped Hauser I'm working on...
| Official Luthiers Forum! http://www-.luthiersforum.com/forum/ |
|
| Gap Filling http://www-.luthiersforum.com/forum/viewtopic.php?f=10102&t=8259 |
Page 1 of 2 |
| Author: | RCoates [ Fri Sep 01, 2006 5:50 pm ] |
| Post subject: | |
What are you guys using? I'm talking about those annoying little gaps between binding and purfling. I've never been able to bind a guitar with no gaps. I get real close but some always seem to show up. Sometimes they aren't visible until the finish is on. What am I missing? I do pore fill with system 3. Maybe I just need to focus a bit more on the bindings when I do this. I also thought of using 5 min epoxy and doing just the edge areas then sanding back before I pore fill. Any thoughts are welcome... |
|
| Author: | RCoates [ Fri Sep 01, 2006 6:13 pm ] |
| Post subject: | |
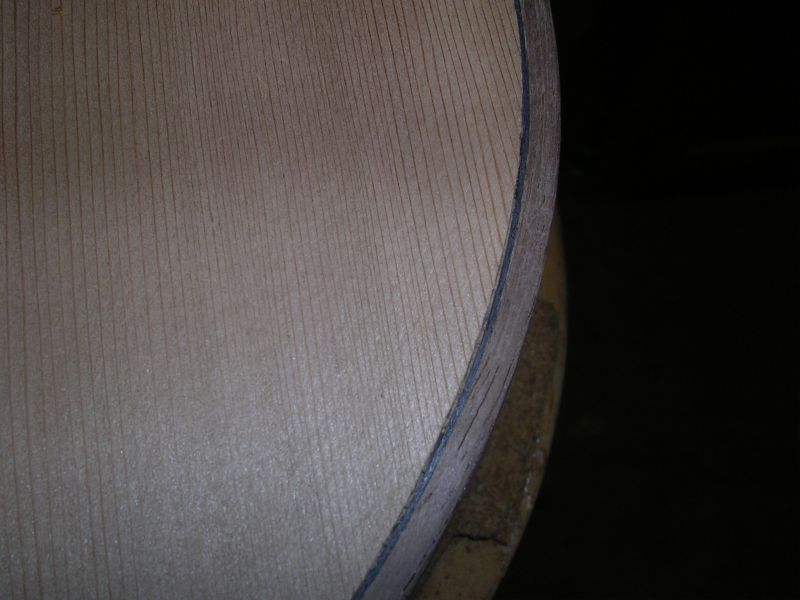
Exhibit A Tell me I'm not the only one who gets these...
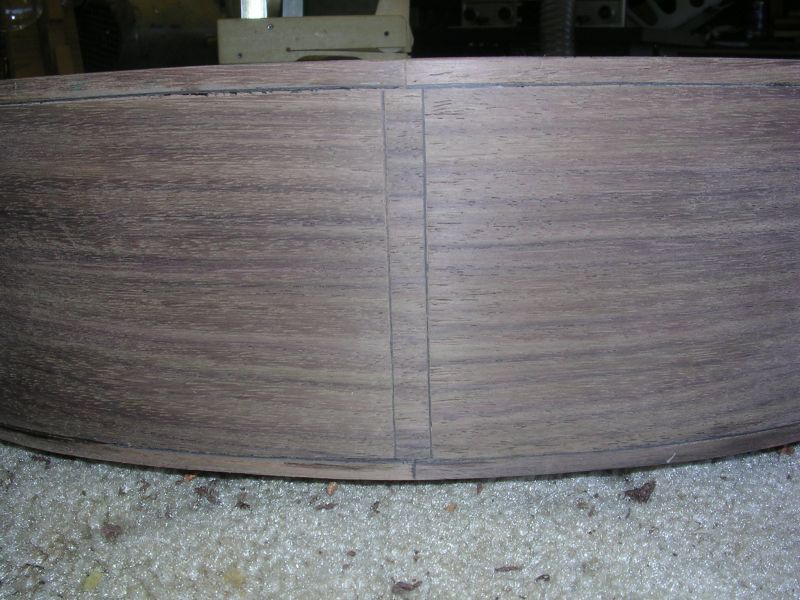
Exibit B Yeah I know this is a big one. Not sure what happened here...
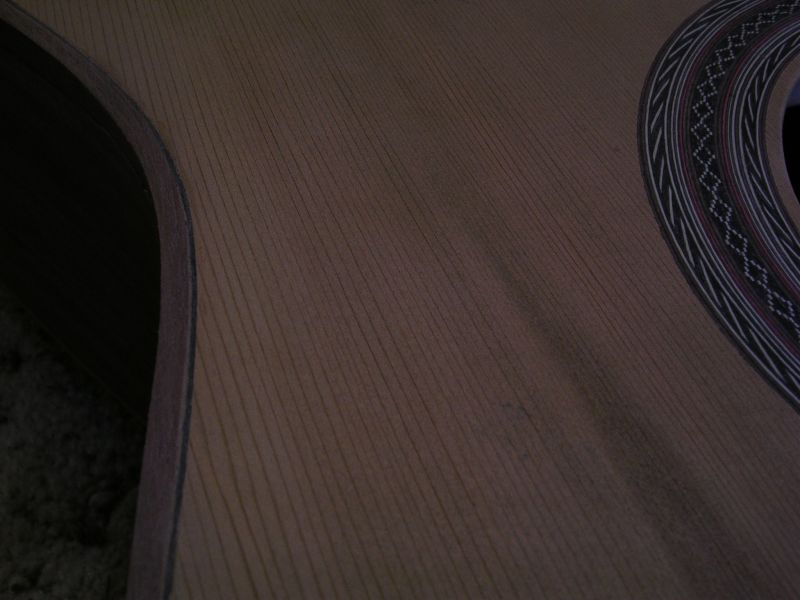
Here's a little preview of the cedar topped Hauser I'm working on...
|
|
| Author: | Dave Rector [ Fri Sep 01, 2006 10:37 pm ] |
| Post subject: | |
For the gaps on the back and sides I would use CA and sanding dust from the B/S. It is pretty hard to hide the gaps on a top, but the best way I've found is to cut little slivers of matching wood to use for the fill. Wish I could tell you a better way, I just don't know of any. |
|
| Author: | Brock Poling [ Fri Sep 01, 2006 11:55 pm ] |
| Post subject: | |
On rosewood, just take a thin drip of superglue on the wood right by the crack. Then while it is wet sand over it in long strokes. Within a few strokes it will fill the gap completely and the rest of the glue will "disappear" You can't fill huge voids like this, but tiny cracks work ok. It is a pretty good color match, but you can kind of see the fix if you are looking for it. This doesn't work as well on lighter woods. |
|
| Author: | SStallings [ Sat Sep 02, 2006 12:20 am ] |
| Post subject: | |
For EIR, I sand some scrap pieces on my spindle sander (make sure the deck of the sander is clean)and then put the EIR dust in a medicine bottle for future use. When needed, I mix a little with epoxy and put it in the gap. After it is sanded flush and the finish is put on, its awful hard to find. |
|
| Author: | Alain Desforges [ Sat Sep 02, 2006 12:58 am ] |
| Post subject: | |
The CA/saw dust works very well for EIR and darker woods. Doesn't work at all for lighter colored woods. Well, I mean it will fill the crack, but the repair will be visible because it is like wetting end-grain. That looks like walnut. For lighter colored woods I try to take slivers of the same wood and just fill the crack with them. I use HHG. If you're patient and take the time to make the sliver an exact match, the repair will look like grain marks. For the tops, the best I've found was using slivers of the same material. As per Paul Woolson's excellent advice, use a sliver that was cut across the grain (or in any direction) so that you can match the grain lines exactly. I now keep the off-cut pieces for this exact reason. I mark them and put them away until the guitar is done, then I'll use them for other stuff but not before I'm 100% sure I won't need it for repairs... |
|
| Author: | CarltonM [ Sat Sep 02, 2006 1:50 am ] |
| Post subject: | |
[QUOTE=Alain Desforges] I now keep the off-cut pieces for this exact reason. I mark them and put them away until the guitar is done, then I'll use them for other stuff but not before I'm 100% sure I won't need it for repairs... [/QUOTE] I know of someone who marked his cutoffs and saved them for a couple of years before recycling them, just in case one comes back. |
|
| Author: | Kelby [ Sat Sep 02, 2006 1:55 am ] |
| Post subject: | |
Ron, As people have said, dust and epoxy/CA will fill small gaps on back & sids (with dark woods) extremely well. But for me, gaps on the top can never be filled to look perfect. (Although I need to try Paul's/Alain's suggestion on slivers; it sounds like a great idea.) Gaps on the sides under the purfling (like your Exhibit B) can be filled, but the purfling will be an uneven distance from the edge, and will look a little off upon close inspection. Which leads into another issue. I started a thread a year or so back asking what kinds of little blemishes others tolerate on their instruments. Several people answered "none." That thread changed the way I think about building guitars. I had never before considered the idea of refusing to accept any mistake on a guitar. My approach to mistakes now -- and this applies especially to binding gaps --- is that unless I can a repair it to be undetectable, no matter how hard you look, then I pull it off and do it again until I get it right. If I'm going to put my name on a guitar, the guitar has to be perfect. Binding can be done with no gaps. I've gone from always getting gaps to getting gaps 50% of the time. For now, that means I always mill twice as much binding as I think I'll need. ;) |
|
| Author: | Kelby [ Sat Sep 02, 2006 1:58 am ] |
| Post subject: | |
Deleted due to double-post. Sorry. |
|
| Author: | Kelby [ Sat Sep 02, 2006 1:58 am ] |
| Post subject: | |
As I re-read my last post, I apologize if it comes off as a little preachy. Obviously, my objective was to offer a reminder that filling a gap is not the only way (and often not the right way) to repair it. |
|
| Author: | Alain Desforges [ Sat Sep 02, 2006 2:06 am ] |
| Post subject: | |
[QUOTE=CarltonM] [QUOTE=Alain Desforges] I now keep the off-cut pieces for this exact reason. I mark them and put them away until the guitar is done, then I'll use them for other stuff but not before I'm 100% sure I won't need it for repairs... [/QUOTE] I know of someone who marked his cutoffs and saved them for a couple of years before recycling them, just in case one comes back. [/QUOTE] Carlton, you know, that's an excellent idea... With my luck, one will come back, probably the day after I've used the 'matching' cut-off for something else... |
|
| Author: | Steve Saville [ Sat Sep 02, 2006 2:49 am ] |
| Post subject: | |
Been there, done that, it isn't pretty. You probably won't be happy with the results. Just a suggestion - why not cut it off and make it right? Those gaps imply a technique issue. Perhaps you cold talk about how to avoid the gaps. How do you rout the ledges and prepare for adding the binding? Is you tool parallel to the sides or perpendicular to the top? Do you use binding tape? If you are in So Cal, you could bring that box to my shop and use my binding jig. |
|
| Author: | peterm [ Sat Sep 02, 2006 3:26 am ] |
| Post subject: | |
Steve, that quite generous of you to make such an offer! Can I move in with you and build my guitars at your shop? 
I will bring my own glue and sweep after I'm done!
|
|
| Author: | RCoates [ Sat Sep 02, 2006 5:26 am ] |
| Post subject: | |
Thanx for all the answers guys. FYI I just went out and measured the "huge"gap in exhibit B. It is 3/64"! I know it looks a lot bigger but I must have had just the right camera angle to look right down inside when the flash went off... So let's look again.. Exhibit B redux 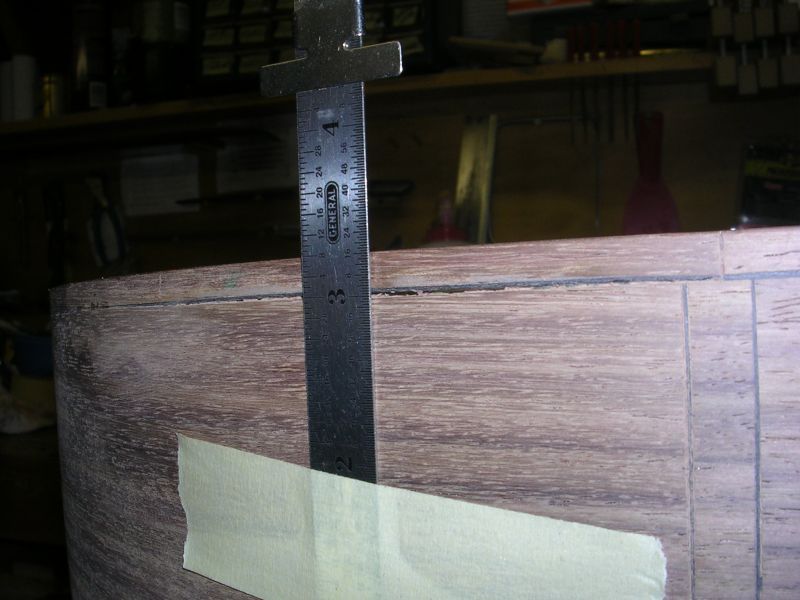
Exhibit A redux 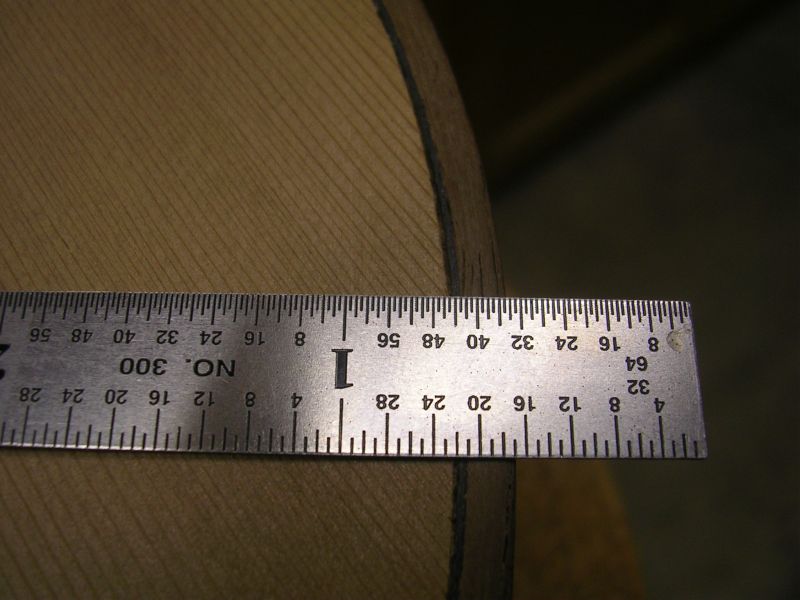
SteveS Thnx for the offer. I'm probably 4 hours from you at best so... For the cost of gas and time involved I could really probably build one. Thnx again for the offer. I really need to build a jig. This has been a continual problem that I really thought I could beat. I currently use a handheld router with a convex base. So just to be clear, Nobody else is getting these type of gaps? Is that correct? If not, did going to one of the binding jigs available end the occurance of such gaps, or am I just being ham fisted in my building? |
|
| Author: | Joe Beaver [ Sat Sep 02, 2006 5:35 am ] |
| Post subject: | |
[QUOTE=SteveS] If you are in So Cal, you could bring that box to my shop and use my binding jig.[/QUOTE] Steve, I'd love to see your jig in action. I've been thinking about making one. Where in So Cal are you? Maybe I could come by some time when you are doing binding? |
|
| Author: | Shawn [ Sat Sep 02, 2006 5:42 am ] |
| Post subject: | |
It is difficult to see from the pictures but is the problem in the cutting of the ledge or is it that the purfling/binding is not staying put while gluing/clamping? On the top it is easier to get a gap because of the gluing/clamping not being tight all around...on the sides it may or may not be the cut. How are you gluing and clamping the purfling and bindings onto the guitar. It is not that I have not had gaps before but I agree with Kelby, I take it off and start again. I trust my ability to cut, glue and clamp than my ability to fill without detection. Even if I am going to use a router to cut the purfling/binding ledge I will still use a gramil as it eliminates the chance of chipout which looks far worse than a repaired gap. If the guitar is a special one for a particular customer I will still cut it all by hand instead of the small time savings of a router. |
|
| Author: | Joe Beaver [ Sat Sep 02, 2006 5:45 am ] |
| Post subject: | |
[QUOTE=Shawn] Even if I am going to use a router to cut the purfling/binding ledge I will still use a gramil.[/QUOTE] Me too... Not that I don't trust my router ability but I just don't. 
|
|
| Author: | Joe Beaver [ Sat Sep 02, 2006 6:13 am ] |
| Post subject: | |
Todd, I for one like it. I see you have pegs on your work board, another good idea! Thank you for sharing!! One question, do you use the workboard for everything or do you use a mold also? |
|
| Author: | Alain Desforges [ Sat Sep 02, 2006 7:22 am ] |
| Post subject: | |
I'll throw in my vote for a gramil as well... Magnificient little tool to have. I free-hand with a laminate trimmer and then I clean up with the gramil. I use Stew-Mac/LMI binding tape, doubled or even tripled up. What I also like to do is keep the binding very hot as I'm going around. I have an old clothes iron I use for this purpose. Since I use HHG, the purpose is two-fold. It gives me a longer working time and I find the hot binding is easier to manipulate (although this I attribute to flights of fancy as I don't think it's really hot enough to become that much 'softer'...) 
|
|
| Author: | RCoates [ Sat Sep 02, 2006 7:28 am ] |
| Post subject: | |
Shawn; I've had both problems in the past and this time was careful to not let the binding ride up over the top/back. In fact, I just went and measured the bindings and the problem you see here is the cut of the rebate. Again I need to build a binding cutting jig. I suppose there's no getting around it. I did use a gramil on the top, but just lightly scored it. Next time, deeper. Todd; I like your binding table and the method you describe. I'll have to do something similar. |
|
| Author: | Serge Poirier [ Sat Sep 02, 2006 11:46 am ] |
| Post subject: | |
Ronn, the jig posted here by Rod True would be an easy and efficient one to build or if the budget allows, the Ribbeke jig which doesn't take much space. Serge |
|
| Author: | MSpencer [ Sat Sep 02, 2006 12:32 pm ] |
| Post subject: | |
Ronn, On the sides an back gap problems I sand up the area and get some dust close to the surface I am going to work on, carfully apply the LMI FCA glue in the gap (I use a fine tip 1 oz squeeze bottle) and then with a sanding block and 220 sandpaper I sand the area around it and slowly move the dust created over the gap. I have tried the dust from scrap premixed and I had to much coloration difference. On top gaps the Sloan tool available on StewMac is nice, but I just cut a wedge shaped sliver out of the top scrap using an exacto knife. It takes some time an patience to get a nice matching tight fit but once you do then I use LMI White glue and set it in place. After it has dried I use this flat narrow razor blade tool to trim to level, hit with some sandpaper and if you match the grain pattern and color it really blends in nice. Mike White Oak, Texas |
|
| Author: | Michael Dale Payne [ Tue Sep 05, 2006 8:02 am ] |
| Post subject: | |
Ronn on the side the gap is very consistant in your picture. It looks like to me anyway that the binding and purfling did not seat on your bottom ledge on one side of the body. This can sometimes be caused by the binding ridding up during glue-up on a radius left in the rabbit by a worn router bit. This can be over come by three means. The first is to over cut the bottom corner of the rabbit with a chisel so that you remove the radius left by the bit. The second is to put a chamfer on the bottom inside edge of the binding-purfling larger than the radius. Third is to get a new bit but it too will eventually wear a radius at the bottom edge of the flute So I chamfer the inside-bottom edges of my bindings. Also what ever tie down method you are using need to both pull down and pull in the bindings |
|
| Author: | rich altieri [ Tue Sep 05, 2006 8:35 am ] |
| Post subject: | |
Ron You are the only one who has this problem of gaps. I know I never have this problem.
Sure !!!! I have gotten better and here is what I attribute it to. First, I went with Stew Mac binding bearings and bit which is giving me good success at reasonable cost (<$90) Next, I have been thinning my wood bindings more which makes them more pliable. I use tightbond and have all my binding tape precut and ready so I can work fast. I copied the approach from Robbie Obrien from his video where the bindings are across from me and pulling the body against my body as I pull the bindings. Then, as soon as one side is finished, I run that cotton straping material (not sure what they call it) around the body binding it all up. I only do one half at a time and waiting a couple hours in betwen sides. Probably not the most efficient approach but I am not working to a schedule. Also, when using a binding with a purfling on the bottom I glue the purfling to the wood binding, scrape it level and then bend the bindings. Hope this helps and realize there are probably much more efficienct approaches but this has been working for me. Most of these tips came from Robbie's DVD series which are a great value, as is John Mayes. I have purchased both and picked up some neat tips from both. Hope this helps |
|
| Author: | A Peebels [ Tue Sep 05, 2006 8:59 am ] |
| Post subject: | |
Ron, No one has this problem but You!!! Sorry 'bout that I just couldn't resist. I started using the StewMac Tool that attaches to a Dremel..does the job, but very easy to get an uneven rabett. Now I use a handheald lam trimmer with a small base, and StewMac bearing cutter. It does a good job, except cuts a little shallow around the upper bout. My next improvement will be a binding jig. My gaps keep getting smaller, but there is always at least one to nag at me. I have had good results at disguising the ones on the top by shooting a few coats of lacquer then drop filling them just prior to the first level sanding. I've used both CA and Lacquer for drop filling with equal results. CA is quicker though. After drop filling I scrape the fills using the razor blade and tape method then wet sand. This only works for the small ones anything of any size, and I would reroute and replace the binding with new. Al |
|
| Page 1 of 2 | All times are UTC - 5 hours |
| Powered by phpBB® Forum Software © phpBB Group http://www.phpbb.com/ |
|